Showing posts with label blythe. Show all posts

Wednesday, December 22, 2010

How to Make a Blythe Hooded Capelet

Once you've crossed into the territory of making snuggies for your Blythes, a hooded capelet isn't that much of a stretch. And it's not that much more difficult, either.

Make a Blythe Hooded Capelet

You will need:

  • The Pattern


  • Fabric for the top


  • Fabric for the lining


  • 18" (45.7 cm) thin ribbon (I like 3mm, personally)


  • Needle & Thread, or a sewing machine


  • Scissors


Download The Pattern Here!
Piece 1
Piece 2

Cut out the pattern pieces, and then cut out:
2 hood pieces from the top fabric (You may want to fold the fabric in half, right sides touching, to cut two mirror images of the fabric at once.)
2 hood pieces from the lining fabric (Ditto the folding and the cutting.)
1 cape piece from the top fabric
1 cape piece from the lining fabric
2 - 9" (22.8 cm) pieces of ribbon

Sandwich the hood and cape pieces together, right sides touching. Make sure you wind up with the hood pieces being mirror images of each other, like so:
Make a Blythe Hooded Capelet - Step 1

Assemble the cape:
Starting in the middle of the top, sew the cape pieces together. Leave about a 1/4" seam. Carefully place the ribbons at the top edges, making sure to tuck them inside. Leave a 1" gap so you can turn the whole thing inside out. Turn it inside out, and stitch up the gap at the top. Be sure to backstitch!
Make a Blythe Hooded Capelet - Step 3

Assemble the hood:
Starting at the middle of the bottom seam, sew the hood pieces together. Leave about a 1/4" seam. Sew all the way around, leaving a 1" gap for turning inside out.
Make a Blythe Hooded Capelet - Step 4
Turn the hood pieces inside out. Sew up the gap on the bottom. Then sandwich the two pieces together, and sew from the top front of the hood, all the way down to the back. Be sure to backstitch! This will leave the front and bottom of the hood open.

Place the hood and cape together, right sides touching, and sew. Again, be sure to backstitch.
Make a Blythe Hooded Capelet - Final Step

Trim the loose threads, and that's it! You're done!
Make a Blythe Hooded Capelet

Feel free to make as many of these as you wish. If you wind up selling them, please link back to my blog in your listing. These tutorials take forever! ^_^

Faux fur capelet is go!


(Behold the fun you can have with other fabrics. This capelet is one of my favorites.)

Monday, December 14, 2009

Introducing the Blythe Snuggie

As I may or may not have whined about on the blog already, I have been sick with a cold for awhile. Which means lots of laying around in sweatshirts, swaddling oneself in giant unbecoming blankets, and daytime tv.
So I guess it shouldn't be too much of a surprise that after a few days my Blythes started looking like this, too.
It's really cold outside.
The first thing I felt up to making all week was a hoodie:
It's cold inside.
Which was pretty meh.
After stumbling around all week in a fleece blanket, it occurred to me to make a Blythe Snuggie. Behold!
Introducing the Blythe Snuggie
Enh!
My goodness, these snuggies are so useful!
Arms up!
Arms up!
But I'm not just keeping the ultimate in ugly fleecewear to myself, no. They are, of course, available in the shop, should you feel the need.
Up next: Chickenpants Snuggies.

Monday, November 2, 2009

New Things

Here's a few new goodies from the Absolutely Small studios this week.
There are some new Chickenpants who are ready to fly the coop:
Willy:


Chickenpants Slim:


Marzipan:


Lil' Orphan Chickenpants:

And I think a few others. I'm trying to list one a day (M-F anyway). Craftland preparations and the general busyness of living get in the way sometimes.

A new stop motion short short, made from the crumbs of Let Them Eat Cake:


One more little critter:

He's only 1" tall! I just started making these. I wanted to see just how small I could make my pompom headed dogs...turns out the answer is "very".

Wednesday, October 14, 2009

DIY Dollhouses

I'm just a little obsessed with tiny environments. Blame my upbringing chock full of make believe and books like Hitty: Her First Hundred Years.
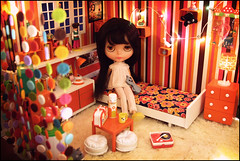
A chance clicking on Flickr led me to the most amazing diy dollhouse ever. She turned an Ikea bookcase (bought 2nd hand, on Ebay!) into a retro manner. It's still a work in progress, she says...but wow, is it ever an inspiration.

Bedtime for Daphne
Originally uploaded by @lollipop@

You can check out the whole set here. That colorful room divider/curtain thing? Handmade, baby.
Added bonus: it makes my Re-Ment addiction seem like nothing. A great thing to show the husband when the tiny boxes start showing up again...
I'm thinking the new house needs a dedicated dolly bookshelf. I've actually started one. It isn't nearly done yet, but you can see the very beginnings of it on my flickr.
Check out this room made from vintage and new miniatures:
It's from a blog called Call of the Small. Love that!
Here's a blog post that has the most wonderful tiny wall paper. (And windowsill! And tiny plants!)

Re-Ment Chateau #7
Originally uploaded by pbrigitte zombuki


One more Flickr find:

Doll house - the living room is almost finished
Originally uploaded by lilolOops


Wow.
So. Seen any good dollhouses lately? Obsessed minds want to know!

Thursday, October 8, 2009

How To Make Blythe Hangers


As those of you following my creative endeavors know, I've recently driven completely off the tracks and am now spending entirely too much time sewing tiny clothes. Once you sew all those tiny clothes, you have a problem, though. How are you going to store all those tiny things? Barbie hangers are fetching absurd sums on Ebay and Etsy. (And my recent Blythe habit hasn't just consumed a lot of time, it's consumed a lot of money, too!)
The good news is, with just a tiny amount of tinkering and a pipe cleaner, you can do it yourself.
Start with a 6" length of pipe cleaner:

Measure out the middle 2 1/4 inches:

(Actually, you want to leave about 1.5" in the front, and 2" in the back. But you don't have to freak out about it.)
Fold up the edges:

Fold the left side in, and around the right side:

Pull the tail of the right side up straight:

Then bend it round your finger to make a hook:

(Or a pencil, or the dowel the clothes will hang on)
Ta da!


You can of course make them from larger pipe cleaners to accommodate wider necklined items. It's really easy to just fiddle around with these things and bend them to your will.
Final step: make a bunch more:

That's it!

Wednesday, September 23, 2009

I am this kid...part two.

Okay, you've probably already seen this:

This kid is SO MUCH like I was when I was her age. It's probably for the best that I was raised in an age when video cameras were bulky luxury items. Anyway, I love this video.
Imagine my delight to find this:

Dolls! Inspired by Kittens! Made by the amazing Jenny Couture.
And then imagine my surprise when towards the end a certain chicken doll near to my heart pops up.
I think this is going to be the best day ever. And I'm not just saying that because I am drinking regular coffee for the first time in months. No, wait, maybe I am. Hey, am I typing really fast?

Tuesday, September 22, 2009

Of Ballgowns & Blythe

I've been giving myself a lot of time slack lately, what with being sick and all. This has meant that when I feel like creating something ridiculous:

Prom dress? Or extremely poofy ballgown.


I just go ahead and let myself do it.
I'm three Blythe dresses sick.

(third dress not yet photographed!) More photos are up on Flickr, as always.
I've also been away from the computer a lot...sorry for the lack of blog posts! Hope to be back, swinging both fists in crafty awesomeness soon!

LinkWithin

Blog Widget by LinkWithin

Let Feedburner tell you when Absolutely Small updates